Monday, March 31, 2014

A Morrocan Beef and Vegetable Tagine

So I'm once again venturing outside of my cookbooks and my comfort zone to try something new and different. Inspired by my bright and sunny jar of lemons slowly being salted on the counter top, I ventured to North Africa to make a rich and savory Tagine--though I should say a stew since I made it in my crock pot not one of these gorgeous dishes. I don't have any cookbooks with Morrocan recipes in it, but with two key ingredients in mind and a little google-fu I found a bunch of ideas and made this dish up as I went along. This is largely inspired by Jamie Oliver's recipe as interpreted by this blog post. I made a number of changes and additions--but it is essentially a stew, so it is pretty flexible!

Ingredients:

12 oz beef sirloin steak
1 1/2 lbs butternut squash pealed and chopped
2 cans diced tomatos
3 cups vegetable broth
1 yellow onion
1 medium head cauliflower
1 large egg plant
4 cloves garlic
1 small bunch cilantro
Sea Salt and freshly ground Black Pepper
2 tsp  Ras El Hanout Spice mix
2 tsp ground Cumin
2 tsp ground Cinnamon
2 tsp ground Ginger
2 tsp Sweet Paprika
Harissa to taste

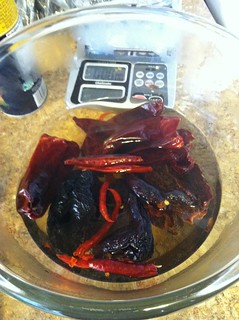
 The first step is to prepare the dry rub. I was surprised to find the ras el hanout at Winco--and it was 2$ for the whole jar--that is not a lot! I had the rest of the spices--though this cleans me out of cumin and ginger, both of which I use a lot of in my cooking. I cut the steak up into cubes and tossed it in the spice rub. Ideally, I would have left it in the fridge for the seasoning to really infuse the meat. But I didn't get going until too late--and it was only in the fridge for about an hour.

The meat is lightly browned on all sides and then diced onion is added along with the chopped stems of the cilantro. These are sauteed until they slightly softened and then I slowly added the broth to de-glaze the pan. There was so much of the spices that sort of stuck to the pan that this was an important step--it toasted the spices and got them into the broth, which thickened it.

At this point I poured it all into the slow-cooker, along with two cans of diced tomatoes. The original recipe called for garbanzo beans, but I felt like I had enough protein with the beef and enough fiber from all the veggies. That got stirred up pretty well, and cooked for two hours on high. While that cooked I pealed and chopped the butternut squash and cut and salted the eggplant.

I added half of the butternut squash after 2 hours of cooking, and the rest after 3.5 hours. This allowed some to really break down and become part of the sauce, while some still had some texture left at the end. I also added some of the harissa to the pot to increase the spice.

While that continued to cook, I chopped the cauliflower and tossed it with some harrisa and lemon juice to marinate before being added to the pot. That went into the pot at the same time as the rest of the butternut squash. The eggplant, which doesn't need as much time to cook was added at about 4.5 hours.

At this point it was almost 9 p.m. and I was pretty hungry--though I'd been nibbling on the butternut squash and tasting the beef all along. I stirred in more harrisa, and served it with some chopped fresh cilantro on top. Total cooking time was 6 hrs on high, though it should have gone a bit more. to get the beef equally tender.

The Verdict: This is a rich and hearty stew--with very complex and developed flavors from all of the time cooking. The veggies provide a variety of textures, from some very soft butternut squash, to the cauliflower that still has some bite. Some of the beef was really tender and some was still pretty chewy--I think this is more the type of beef I used, I should have gotten more of a fatty cut and cooked longer and lower. It was still very good and I'm excited to play around with these flavors!


Friday, March 28, 2014

Martha Stewart's Carrot Cake cupcakes

No eggs, no go!
The final recipe I tried was from Martha Stewart's Cupcakes. Sadly, as good as I was cooking the first two, all of my bad habits came back in this dish. In fact I made it twice, because I forgot the eggs! Let me repeat I forgot the EGGs! Who does that!? How did it even bake into cakes that rose at all? Anyways, when I went to make it again I changed the recipe somewhat. The original calls for a cup and a half of oil--that is a crapload of oil, the batter was oily and while the cakes didn't taste oily, they didn't have eggs so what could I tell. The other issue was that I'd only bought a little of the golden raisins from the bulk bin, so I didn't have enough for the second round. I had some dried apricots from another dish that I chopped really really fine and used with what raisins I did have. So besides dividing this in half I reduced the oil from 3/4 of a cup for a half batch to 1/3 of a cup of oil and the rest crushed pineapple and juices.

Ingredients:

1 pound carrots
3 large eggs
1/3 cup buttermilk
2 cups sugar
1 1/2 cups vegetable oil
1 1/2 tsp vanilla
1/2 golden raisins
3 cups all purpose flour
1 tsp baking soda
2 tsp baking powder
1 tsp salt
1 tsp ground cinnamon
1 tsp ground ginger
1/8 tsp ground cloves

So the first thing I did was screw up the first batch, then I tried again. This recipe starts in a different way. The carrots, raisins (and apricots), sugars, oil (and pineapple), buttermilk, and vanilla are mixed together well--if you don't reduce the oil this needs to be whisked a lot or you have an oil slick. Next the dry ingredients are whisked together in a bowl, and slowly folded into the wet ingredients until just mixed. This is a very wet batter, much runnier than the others--even in the batch where I forgot the egg it was thinner.

This went into a cooler oven--325 degrees for 10-12 minutes for the mini muffin tin and 22-24 minutes for the bigger muffins. I did turn half way through to get even cooking.

This recipe turned out an entirely different tasting and appearing cake from the other two. These are a pale light color and rose pretty well even without the egg! You can see on this picture, these cakes are in the middle of the two others, and really stand out in comparison.


The Verdict: This recipe--even without my changes, is much sweeter, still moist, but less dense and more airy. I think in part the fact that this uses all granulated sugar made a big difference. The extra add ins really contributed to a different texture and flavor profile--with the pineapple, raisins, and apricots this is more fruity as well. I found it addictive, and ate way more than I should because it feels so light. It isn't light, though, so watch out. The interesting thing is that this was the clear winner, even though I mangled the recipe--my sister liked it best, and it got the most votes at work as well. Personally I think it was good, but not a traditional carrot cake taste.  It makes a good cupcake, but if you are looking for a more traditional texture and flavor go with the other two.


Wednesday, March 26, 2014

The Craft of Baking Carrot Cake Cupcakes

 The next carrot cake I tried is from The Craft of Baking. I actually have baked a cake from this before--but never ended up blogging about it, even though it turned out fine. As I recall, I'd typed it all up and the internet ate it. I guess the cake was so good that it wanted it all. Anyways, this is a nice recipe, pretty standard, except it calls for demerra sugar instead of white or brown. It is also the only recipe I didn't have to divide. It makes 14 cupcakes, which is a strange amount if you ask me.

Ingredients:

1 pound large carrots
1 1/2 cups all purpose flour
1 1/2 tsp cinnamon
1/4 tsp grated nutmeg
1 tsp salt
1 tsp baking powder
1/2 tsp baking soda
1 cup Demerara sugar
1/2 cup vegetable oil
1/2 cup light sour cream
1 tsp vanilla extract
1 large egg plus one yolk

With the carrots already grated, the first step is adding the dry ingredients and sifting them together, and set aside. The sugar, oil, sour cream, and vanilla are whisked together until blended and then the egg and egg yolk are added in and whisked together.

The flour mixture is added in slowly, until just combined, and then the carrots are folded in. The batter is even thicker than the ATK recipe, and really resembles more a muffin batter than cake.


Since I made this as directed in the book, it made a lot of mini muffins and still over a half dozen regular sized cupcakes. The mini ones cooked in a 350 degree oven for 10-12 minutes, and I turned in the middle of the time. The regular sized ones cooked for about 20 minutes, they were a little overdone, but I didn't fill all of the cups. My sister has since told me that I should fill the unused spaces with water before cooking. Well you live and learn.

The Verdict: A light and moist cake that has a really delicate crumb. It isn't too sweet, with a strong carrot flavor. This was pretty similar in taste and texture to the ATK recipe, though this clearly has more fat with the extra egg yolk and a little more oil. The demerara sugar didn't really produce different results than the brown sugar/granulated sugar mix. This was slightly more popular than the ATK recipe at work--though it was option A so some folks commented that they thought the first thing they tasted was the best. Someone did comment that they thought it had a lemony taste--which I couldn't figure out. I did add some orange zest to the frosting, but I used the same frosting for all of them.


Monday, March 24, 2014

Carrot Ginger Soup with roasted veggies


This soup recipe came from one of the local cookbooks I picked up at the thrift store a couple weeks back--a Junior League Cookbook focused on seasonal appropriate foods. With spring in the air, I wanted to make something to celebrate the wonderful weather and something from a local cookbook designed for the season seemed even more perfect.While these are not to my knowledge local carrots, we do have winter carrots coming on nowish.

Ingredients:

1 large onion
3 cloves of garlic
1 tbs light butter
2 lbs carrots
1 tbs grated fresh ginger
4 c vegetable stock
1 tsp salt
1 tsp white pepper
1/2 c lite coconut milk

I actually only made two small changes to this recipe--reduced the amount of broth used and replaced the optional half-and-half with coconut milk. The first step is to prep everything--peel onion, carrots, garlic, and ginger. Dice the garlic and onion, chop the carrots, grate the ginger. I've learned that having the food all prepped before hand really makes it come together quicker, and prevents things from overcooking.


I put my dutch oven on medium heat and melted the butter, then dropped the onions and garlic on to saute. Once they'd started to soften, I added the ginger, pepper, salt, and all the carrots. This sautes for a while, which gave me time to get the broth going. I made it up using better than bullion--so the water needed to come to boil. Once that was made up, I poured it into the sauteed veggies. This cooks down until the carrots are very tender. Then I use my stick blender to puree it, adding in the coconut milk at the end.


The white pepper is very strong, so if you don't like a lot of heat you might add half as much and adjust to taste. I like the heat, but found it best with some coconut milk to cut it. I served this topped with some asparagus and baby bok choy I roasted in lemon with white pepper and ginger. And a nice slice of homemade whole wheat bread to go along with it.

The Verdict:

This is a simple yet very flavorful soup, that is very healthy and satisfying. The white pepper and fresh ginger are a little strong, but I like a soup with assertive flavors. If I were to make this for work, I would reduce both seasonings and have more coconut milk for people to add if it were still too strong. This would be a good soup for a cold as the ginger will clear your sinus' out. The recipe says it could be served chilled or hot.


Friday, March 21, 2014

Some like it Hot--with Harissa

So I like spicy foods--not burn your mouth off spicy, but I don't mind my food biting back. So when I was planning my foray into North African cuisine, I wanted to try some of the spicy variations of their dishes. I found that they have a peppery condiment called harissa. Apparently you can buy it pre-made in some stores, but I didn't see any, and it seemed pretty easy to make. One thing that is very easy to find around here is dried peppers, which is the main ingredient.

Untitled Ingredients:

1.5 oz dried red peppers
3-4 garlic cloves
1 tsp salt or to taste
1 tsp ground cumin
1/2 tsp ground corriander
juice of one lemon
1 tsp olive oil


UntitledUntitledI bought an assortment of dried chilis from the bulk bins at Winco. They were just labeled New Mexican Dried Chilis, though there were clearly three different kinds represented. I purchased and used about equal amounts of each. I suspect that some were hotter than others, but I figure this would give a good balance of flavor. I looked them up on line and it looks like I used some anchos, arbols, and a New Mexico red chilis.

UntitledUntitledThe first step is to take all the seeds and stems out, which was a little harder with the tiny spicy arbol chilis and the big gummy ancho peppers.This keeps the sauce smooth and keeps the heat level at a reasonable level.

UntitledNext the cleaned peppers are covered with very hot water and soaked for at least a half an hour--I soaked them while I ran to the grocery store to get some things I've forgotten, so I'm not sure how long I left them in there. Anyways, when I got back I drained and dried them. They went into the blender cup along with the spices, garlic, lemon zest, and some of the lemon juice.

This gets blended until it forms a fine paste, adding more liquid once it was all broken down and smooth. I added a teaspoon of olive oil and the rest of the lemon juice and continued to puree it. I poured it in a glass jar and will use it in my tagines, roasting veggies, and even with my eggs!

The Verdict: There is a fine balance between hot and so hot that all you feel is burning and no flavor but heat. This still has a great garlic and lemon flavor with different layers of heat and smokiness. I look forward to having this on many more things. It should keep well, with maybe some olive oil to smooth out.


Wednesday, March 19, 2014

Carrot Cake from Best Light Recpes

So one of my resolutions this year is not just to bake more and improve my skills, but to find more ways to share what I make so it isn't just me chowing down and judging what is good and bad. I like what I like, which isn't always what everyone likes. So I decided to bring in goodies for Birthdays for my coworkers--we are pretty small, only about 10 of us at the location, so it is not a lot of people to treat. The one trick is that some don't eat sugar or try to eat healthy. Anyways, we had a birthday coming up and the staff member requested carrot cake. I tried to make some carrot cupcakes a while back that were terrible--as in I ate one and a half and threw the rest out. So I wanted to make something a step above that--and have something edible to bring in.

Selecting a recipe to try was difficult--it seems like half of my books have carrot cake recipes. So I decided to try three recipes and hope at least one turns out well enough to bring. The first one I'm going to post about is the recipe in The Best Light Recipe by Cooks Illustrated. I did a half batch and made some in a mini cupcake tin and some in a regular cupcake tin.

Ingredients (this is for the full batch, to split required some eyeballing):

2 1/2 c unbleached all-purpose flour
1 1/4 tsp baking power
1 tsp baking soda
1 1/4 tsp ground cinnamon
1/2 tsp ground nutmeg
1/8 tsp ground cloves
1/2 tsp salt
3 eggs
1 cup light brown sugar
1 cup granulated sugar
1/2 cup vegetable oil
1 pound carrots--about 3 cups


I don't have a food processor, so I went at my bag of carrots with my grater and some arm muscles. All together for the three batches I needed 2 pounds of carrots--I weighed after I grated, though I should have done it before--I ended up with more than I needed. I did all the carrots for all the cakes at once and set them aside. 

As with most ATK recipes, this relies not only on the ingredients, but the technique to produce the correct results. Dry ingredients are sifted together and set aside. The eggs and sugars are beat together until they are thick and creamy--which takes a couple minutes with an electric beater. Once that is mixed, the oil is added slowly while beating. this is clearly better if you don't use a stick beater or if you have three hands. The flour is added in two batches, stirring, not beating it in, until smooth, when the carrots are gently folded in.

This isn't a super runny or thin batter, especially with the carrots added in. So it needed to be divided into the pans with a spoon, not poured. I filled the cupcakes 3/4 of the way full and baked them in a 350 degree oven until a fork came out mostly clean. The mini muffins cooked for about 5 minutes and then I turned the pan and cooked them for another 5-6 minutes. The larger ones cooked about twice as long.

The Verdict: Moist and flavorful, with a very tender crumb. Not too sweet, with a light spice. This was probably the least popular at work, but I found this recipe and the craft of baking's recipe to have nearly indistinguishable results, though they have different methods and ingredients. The one thing I like about this recipe is that it has less oil but doesn't have a light taste--it is still moist and delicious.


Monday, March 17, 2014

Buffalo Turkey Meatloaf

I was just going to do 3 flavors when I ran across a picture of a chicken buffalo meatloaf muffin and knew I had to try it. I bought a bottle of buffalo sauce a while ago and have been finding more and more things to put it on, and I had an almost limp beyond relief bunch of celery. So this seemed perfect!

Ingredients:

8 oz turkey and chicken sausage mix
1 bag (about 1/3 cup) baked potato chips crushed in the bag
1/2 cup celery stems and leaves chopped fine
half a green bell pepper chopped fine
1 1/2 tbs blue cheese crumbled
1/2 cup mushrooms and onions
1/4 cup egg substitute
2 tbs frank's buffalo wing sauce
salt and pepper
roasted red pepper
roasted garlic

Since this one was last minute addition , I was trying to think of a different binder to use to bring it together. I'd bought these individual serving bags of chips, in a variety of flavors, and I ate all but the plain ones--they just aren't good without some flavor added or with a dip. So this is not a bad use, the bag was even thick enough to break the chips through without tearing the bag!

All of the ingredients went into the bowl and got smooshed together--it was really loose and seemed like there was too many add ins to meat. So I added another bit of meat. It got packed into cupcake tins and baked in the oven for 25 minutes at 350 degrees.


The Verdict: Yum! The celery and buffalo flavors really come out very well in this--and topped with just a splash of extra buffalo sauce it is spicy and flavorful. The cheese doesn't really come out, and the texture is really loose so it is fairly crumbly. My naughty dogs really wanted some of this delicious celery filled yumminess, so while I was off hanging out with Alice, the two of them got into the garbage and dragged the remains of the celery out to gnaw on for a while. They were probably jealous that Huck got to eat a whole muffin!