Showing posts with label cookbook. Show all posts

Wednesday, April 23, 2014

Garlic Parmesan Pot Boile

So after the success of my first bread baking experiments, I wanted to make some when my family said they were having dinner. They always like bread--so while the menu wasn't set I planned to take a garlic Parmesan pot boile. Typically for me the second time I made stupid mistakes, demonstrating my need to follow directions ALWAYS, but especially when baking.

Ingredients:
1 head garlic
1 tbs olive oil
1/4 c grated fresh Parmesan, plus extra for garnish
15 oz bread flour
5 oz whole wheat bread flour
2 tsp table salt
1 1/4 tsp instant fast rising yeast
2 c plus 2 tbs ice water


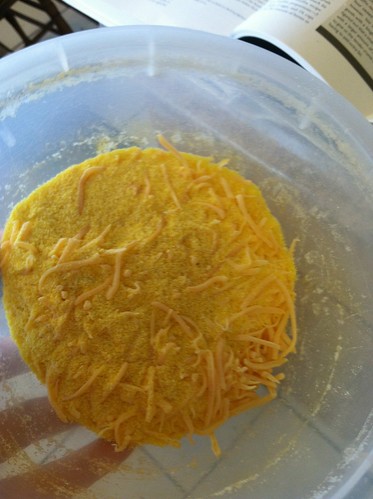
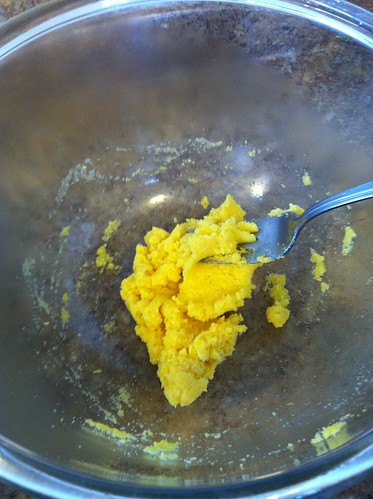
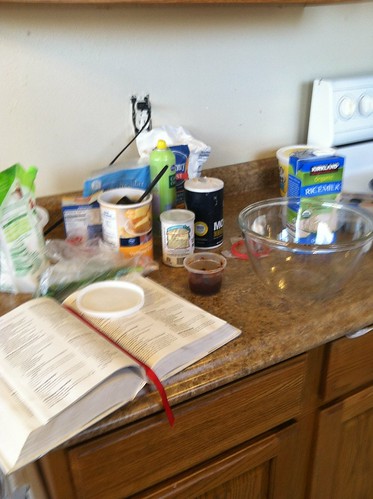
This is pretty similar to my first loaf of bread I made from this Kneadlessly Simple Book, with some added extras to make it more of a dinner bread. Before I could even get started on the bread, I needed to roast the garlic and grate the Parmesan. I usually do multiple heads at once because they are so delicious and go in so many dishes! The book's directions calls for using more oil and a custard cup than I usually use--I just cut off the tips, spray with cooking oil, and wrap in foil. The packets go in a preheated 350 degree oven for about 40 minutes. It is important that they cool down ALL the way before you put them with the Parmesan or it will create a greasy mess. I may have learned this the hard way. Once it is all cooled, take the garlic out of the skins and mash them really well with a fork to form a paste. Then add it to the grated Parmesan. This can be done in advance.

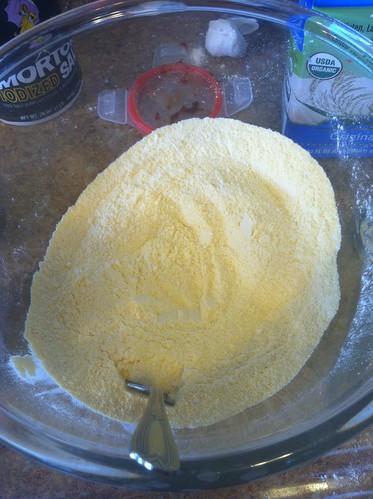
So in a big bowl whisk together all of the flours, salt, and yeast. Then in a measuring cup I mixed the water and the garlic mixture really well, and then added it to the dry ingredients. It takes a bit of stirring to combine, and you want to make sure you get all the garlic and cheese mixed through.  Once the dough is together, spray the top with cooking spray (olive oil would be nice). I stuck it in the fridge for about 6 hours, though as much as 10 hours. Then the dough raises in a cool space for between 12-18--I set it out around 9 or 10 before bed.

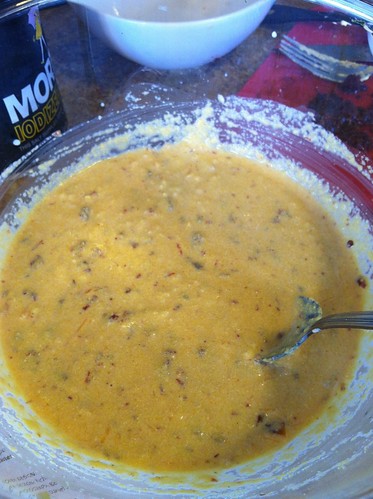
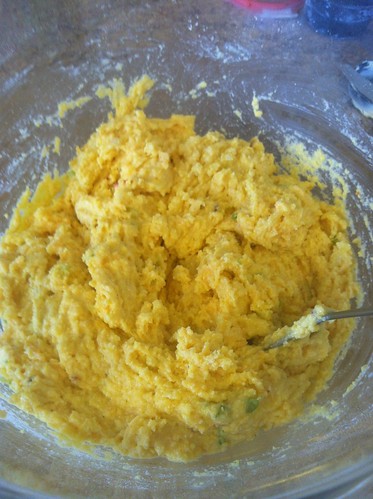
After the first rise, the dough is gently deflated with a rubber spatula and allowed to rise again for another 2 1/2 hours in a warm place. The real advantage to doing the first rise at night and the second in the day is that my apartment is normally cooler at night and warmer in the day--so it can actually stay in the same place.

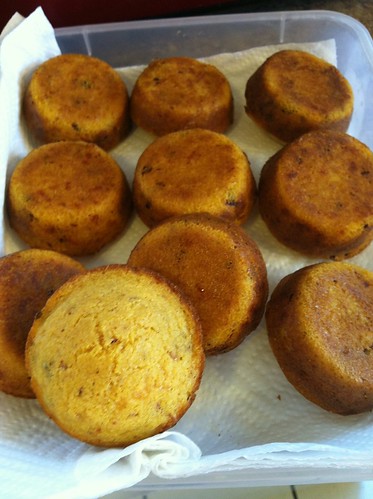
Here's the part I messed up--the dutch oven goes into the oven and it all preheats to 450 in the last 20 minutes before the end of the final rise. Then the dough is gently turned out into the screaming hot pan, a little water is drizzled on top, and the remaining Parmesan is sprinkled on top. The lid goes on the pot and it gets shaken to settle the dough. Then (and this is the part I forgot) the oven is turned down to 425 degrees, the pot is returned to the oven, and it bakes for 45-50 minutes. I didn't turn down the heat, so it baked for the first 45 minutes at 450. At this point, the lid can come off if the bread hasn't browned--either way it cooks for another 10-15 minutes until it is done.

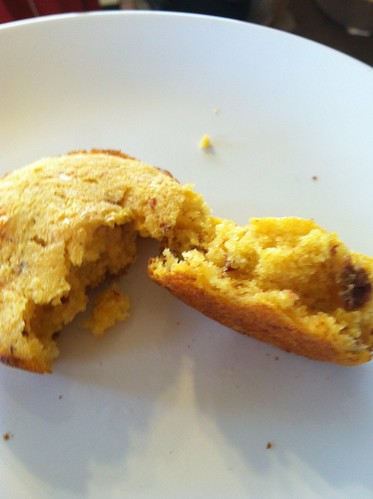
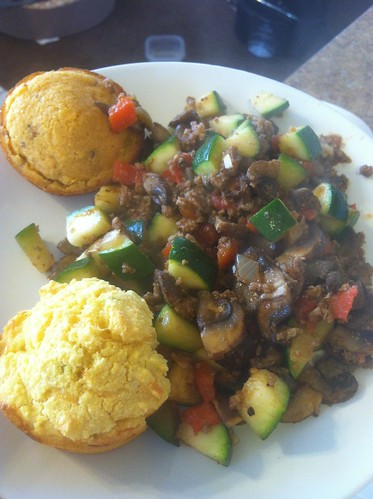
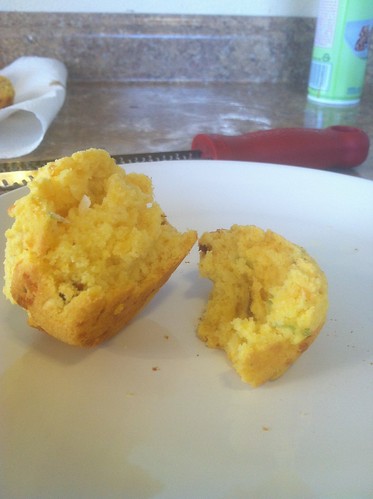
Verdict: It is a bit hard to see, but it got a little over browned, the crust was extra crusty. The garlic flavor was super strong, not as much the Parmesan. I thought it was good, though I think that the pesto version might balance out the garlic. Also we ended up eating it with a dinner of quesidillas and quinoa, which was strange. But my sisters nibbled away at the bread, and said they thought it was delicious. Even my picky niece ate a bunch of the soft garlicy center.

Wednesday, April 16, 2014

Tunisian Tuna Bricks

I made this quick meal from a cookbook we just got in at the library, Comfort Pie. Since I'm in charge of that area I look at all the books that come in, and was surprised to find a recipe in this locally published book that used harissa. As the title of the book suggests, there is not a lot of healthy cooking contained in the pages, and this recipe is no exception. A fried pastry was not something I was willing to take up, and I couldn't find any brick pastry, but regular pyhllo dough baked in the oven worked as well.

Ingredients:
1 can tuna in water
2-3 tsp harrisa
eggs
red onion
red bell pepper
lemon
corriander
cumin
salt and pepper
cilantro
Phyllo dough sheets


The tuna is drained and mixed with the harissa paste, cumin, coriander, and salt and pepper to taste. I chopped half a red pepper and about a fourth of a good sized red onion and the good parts left from a sad looking bunch of cilantro I found in the back of the fridge. This went into the tuna mixture. The recipe called for more onion, cilantro, and pepper to be made into a salad, but I didn't have much cilantro. I added some lemon juice to the tuna for flavor.


 Part of the tuna is portioned onto two sheets of phyllo dough and a well made in the center and an egg yolk with a little of the white is placed in the center of the tuna. Then the top of the phyllo is wrapped around and folded up and sealed with water. I sprayed the top with some cooking spray and placed the packets in an oven that had been preheated to 375 degrees.


 I cooked it for about 10 minutes and check it, and then let it cook for about 5 minutes more. It probably could have gone a few minutes more, but I was hungry!


The Verdict: There was a nice balance of flavors and textures with the spice from the harissa, the fatty egg yolk, the crunchy phyllo exterior. It was not as light as some of the things I cook, but it was very satisfying and the phyllo actually was the perfect amount of "bread" to tuna salad. I was worried about how the egg would work in it, but I love a runny egg yolk, and this made a nice sauce for the tuna. I re-heated the second one in a sauce pan that was really hot--it got the phyllo extra crispy and was just as good. I still have some of the tuna left, so I plan on making a few more later!

Wednesday, March 26, 2014

The Craft of Baking Carrot Cake Cupcakes

 The next carrot cake I tried is from The Craft of Baking. I actually have baked a cake from this before--but never ended up blogging about it, even though it turned out fine. As I recall, I'd typed it all up and the internet ate it. I guess the cake was so good that it wanted it all. Anyways, this is a nice recipe, pretty standard, except it calls for demerra sugar instead of white or brown. It is also the only recipe I didn't have to divide. It makes 14 cupcakes, which is a strange amount if you ask me.

Ingredients:

1 pound large carrots
1 1/2 cups all purpose flour
1 1/2 tsp cinnamon
1/4 tsp grated nutmeg
1 tsp salt
1 tsp baking powder
1/2 tsp baking soda
1 cup Demerara sugar
1/2 cup vegetable oil
1/2 cup light sour cream
1 tsp vanilla extract
1 large egg plus one yolk

With the carrots already grated, the first step is adding the dry ingredients and sifting them together, and set aside. The sugar, oil, sour cream, and vanilla are whisked together until blended and then the egg and egg yolk are added in and whisked together.

The flour mixture is added in slowly, until just combined, and then the carrots are folded in. The batter is even thicker than the ATK recipe, and really resembles more a muffin batter than cake.


Since I made this as directed in the book, it made a lot of mini muffins and still over a half dozen regular sized cupcakes. The mini ones cooked in a 350 degree oven for 10-12 minutes, and I turned in the middle of the time. The regular sized ones cooked for about 20 minutes, they were a little overdone, but I didn't fill all of the cups. My sister has since told me that I should fill the unused spaces with water before cooking. Well you live and learn.

The Verdict: A light and moist cake that has a really delicate crumb. It isn't too sweet, with a strong carrot flavor. This was pretty similar in taste and texture to the ATK recipe, though this clearly has more fat with the extra egg yolk and a little more oil. The demerara sugar didn't really produce different results than the brown sugar/granulated sugar mix. This was slightly more popular than the ATK recipe at work--though it was option A so some folks commented that they thought the first thing they tasted was the best. Someone did comment that they thought it had a lemony taste--which I couldn't figure out. I did add some orange zest to the frosting, but I used the same frosting for all of them.


Wednesday, February 19, 2014

Cornbread Muffin Cook-off: America's Test Kitchen

For my second cornbread attempt I went to the south, and the Best Light Recipe cookbook from the America's Test kitchen. Unlike the last recipe I tried from this book--the incredibly complicated and time consuming tomato soup--this was pretty simple and didn't require a lot of complicated steps or ingredients. I did add some things not in the recipe--following the directions from the Joy of Cooking for add ins.

Cornbread muffinsIngredients:
cooking spray
1 cup yellow cornmeal
1/2 tsp stevia baking blend
1/2 tsp salt
1 tsp baking powder
1/4 tsp baking soda
1/3 cup boiling water
3/4 c half and half (the recipe called for buttermilk, but this is what I had)
1 large egg
1 tbs butter (I used light butter)
Add ins:
two chipoltes in adobo, seeded and rinsed
3 cloves roasted garlic
1/3 cup shredded sharp cheddar cheese

Preheat the oven to 450 degrees, moving the rack down to the lower middle position. Spray the muffin tin with cooking spray (the recipe is actually for a round or square cake, I decided to do muffins--the corn muffin recipe in the book is a different animal altogether--it calls for a whole cup of sugar!)

Cornbread muffinsCornbread muffinsPut 1/3 of a cup of cornmeal in a medium bowl, while the water boils. The book suggests boiling quite a bit of water and measuring out 1/3 when it is at a hard boil. I just put it in the microwave, since I don't have a kettle and don't want to get burned. The rest of the cornmeal goes into a smaller bowl with the salt, sugar, baking powder, baking soda, and the cheese. Once the water is at a high boil it goes directly into the 1/3 cup cornmeal to make a thick mush. After the water was added, I melted the butter in the microwave in the same dish.
Cornbread muffinsCornbread muffinsThe next step is to gradually whisk in the half-n-half or buttermilk, breaking up the lumps until smooth. I then added my add ins, and a lightly beat egg and the butter. Then the dry ingredients are quickly stirred in, being careful not to over beat. This is a much softer batter than the other cornbread, and can be poured into the pre-greased pan. At this point, even before cooking, the batter has an enticing scent from the garlic and peppers, and the adobo colored the batter a lovely rosy color.

Cornbread muffinsCornbread muffinsThe pan goes into the pre-heated oven for about 12-15 minutes, or until golden brown. These didn't rise as much as the other muffins, but they developed the most delicious crust. The book does suggest flipping it out to cool on a rack--which I haven't purchased, so I put them on a cloth. Of course, I had to eat one steaming hot out of the oven.


Cornbread muffinsThe Verdict:
So good--very flavorful, with the right balance of crispy corn outside, to soft inside. This has more of a cornbread feel to me, less of a muffin, and more of a delicious smokey corn goodness. I could eat these plain, with chili, warm, hot, cold, or nine days old. They are quite spicy, which I love, and need nothing to accompany them. Both of my cornbread muffins are good, but this is the one I'm likely to come back to to try again. Maybe I'm just a southern cornbread girl, though I'm not from the south!

Monday, February 17, 2014

Cornbread Muffin Cookoff--The Joy of Experimentation

So half of the folks at work have sworn off sugar, and since we have a small staff this leaves me and three or four other people to eat any goodies I bring in! So for the birthday of one of these sugar avoiding coworkers, I have made cornbread muffins. It was such a quick process that I decided to make a second batch following a different recipe, so I could see which were better.

Cornbread recipes are a dime a dozen, so I am consulting two of my most authoritative cookbooks, The Joy of Cooking  and The Best Light Recipes, from the American Test kitchen, the ones with the most information about the recipes and guidelines about how to create it right. The first I'm blogging about is The Joy of Cooking, which offers a list of ways to modify the basic recipe with different additions. One thing I've learned from reading these two recipes is that cornbread is very regional, with two main camps the southern cornbread (which is just cornmeal and no flour, and traditionally is made in a cast iron skillet) and the northern cornbread, which has flour and cornmeal. I'm making one of each kind--so they may not compare directly across.

Cornbread muffinsIngredients:
1 1/4 c yellow cornmeal
3/4 c all-purpose flour
2 1/2 tsp baking powder
1 tsp stevia cooking blend
3/4 tsp salt
1 large egg
2 tbs butter
1 cup milk
Add ins:
1/2 c grated sharp cheddar cheese
2 green onions
2 cloves of garlic grated
1 tsp chipotle seeded, rinsed and chopped fine.

Cornbread muffinsCornbread muffinsPre-heat the oven to 425 degrees, and spray the muffin tin with cooking spray. Melt the butter in the microwave and set aside to cool. Whisk together the dry ingredients and the cheese in a large bowl. In a smaller bowl mix the egg, milk, butter and wet add ins. In this case, I used onions, garlic, and chipolte, and a good crack of black pepper. The book has a long list of different things that might be added to change the flavor profile, and actually suggests a much larger amount of chipolte, but I'm not sure how spicy my coworkers like things!

Cornbread muffinsCornbread muffinsThe wet ingredients are combined with the dry ingredients just barely--the book says with just a few rapid strokes. This is a thick and chunky batter, and needs to be scooped into the dish rather than poured. Smooth over the tops, because it doesn't spread and will come out the way it goes in!

Cornbread muffinsCornbread muffins They bake in the 425 degree oven for 15-18 minutes or until nicely browned--though I found the tops were less browned than the bottoms.

 The Verdict: There is a nice crunch on the outside, with a creamy soft inside. The flavors are not overpowering the sweetness of the corn, and there is a definite muffin consistency to them. You can taste the flour in a surprising way. They are good by themselves, but are best with butter or with a main dish. I ate mine hot out of the oven with a hash made up of leftover picadillio, zucchini, mushrooms, and roasted red pepper.

Friday, February 14, 2014

Many Mini Quiches

Making Quiche, Julia's way!
So even though the cheesecake cupcakes turned out delicious, my older sister vetoed all of my cooking ideas for our bridal shower except one. Mini quiches! I already had fillo shells that I'd bought intending to make something for work, so I wanted to use them up to free space in my freezer. Plus they are best for occasions where they are served right away, instead of needing to be made in advance.

I am using a method explained in a nifty Julia Child cookbook I bought--Julia Child's Kitchen Wisdom. The book has some specific recipes for quiche, but it also has the ratios for making your own recipes. Really, that is my style--a general guideline that lets me innovate!

Ingredients: 

fillo shells
Eggs
Half and Half, Milk, light cream
salt and pepper, nutmeg
spinach
mushrooms
garlic
green onion
red bell pepper
sharp cheddar cheese

So Julia explains that the ratio for the custard of liquid to egg--whether milk, cream, or half and half--is determined by cracking the eggs in a measuring cup and adding liquid to get to the right amount. So for one egg you add up to the half cup measure for two eggs you fill up to the one cup measure. My liquid measuring cup only goes up to one cup, so I did 2 eggs twice. I'm not sure how much mixture I'll need for the amount of shells I have, but I figured better more mix than less.

The book has a list of different filling options, but helpfully lists other possibilities as well as encouraging experimentation. For a 9 inch pie it says one cup of filling--that is a 3 egg mixture. So that is the amount of filling I aimed for.

I first put a head of garlic in the oven to roast, along with a red pepper. Then I sauteed the white part of some green onions and a few mushrooms--both diced really fine. While that was cooking, I defrosted some frozen chopped spinach, and drained it really well before adding it to the mushrooms and onions once they'd both softened, sauteing it all together with a good dose of salt and pepper. Since this is going into pretty small shells I chopped the mix really fine after it had cooled a bit. Once the garlic and pepper had roasted, I chopped four cloves of the garlic and half of the pepper and added that to the spinach and mushrooms mixture. After that had cooled completely, I added it to the egg custard and whisked it well.

Since I was making these for a party, I made the filling the night before and cooked them at my sister's house right before the party started. I did make two before to test the seasoning and decide what kind of cheese to use. In one I added some feta and cheddar and the other just the sharp cheddar, but the feta didn't really stand out to me, so I didn't add it in the final batch. 

These were actually quite quick to throw together at the party--I sprayed two cookie sheets with cooking spray, laid out the shells, put a pinch of cheese in each, and then using a liquid measuring cup poured a little of the mixture in each shell. They go in a preheated 375 degree oven for 12-15 minutes and can be served warm or room temperature. I finished them off with a shake of salt over the top to give a nice finishing touch.

Untitled
Add caption
The Verdict: The tray was empty at the end of the party and there were none left half eaten, so I suspect that people liked them. My older sister said that she liked the filling, and my younger sister said I was creative (I'm not sure if that is a complement!) I thought the combination of flavors was just right--the sweet garlic and pepper, the sharp cheese, the mushrooms, onions, and fresh spinach, and the crunchy shells added a nice texture. I've never made quiche before, and this was a pretty successful first attempt! I like the idea of trying different fillings and flavors, and it was a nice party dish!